Korean Highland Potato Seed Preparation — Cutting Protocol, Pre-Sprouting (Chitting), and Maximising Emergence Uniformity

At Korean highland altitudes, the growing season is 90–110 days — there is no time to recover from a slow or patchy emergence. The decisions made at seed cutting and pre-sprouting determine whether the field is uniform by Day 18 or still catching up in Week 4.

감자 재배 시스템 계획 컨설팅

The 7-step Korean highland potato system described throughout this series focuses on field preparation and machinery operations. But Step 4 — planting with the EP-PAI-2100 — begins with seed quality, and seed quality is determined in the 2–4 weeks before planting when certified seed is removed from cold storage, inspected, cut (if above the optimum whole-seed size), allowed to suberise, and optionally pre-sprouted (chitted) before being loaded into the planter hopper. These operations receive less attention in Korean highland farming guides than the machinery operations — yet their outcome directly determines the emergence uniformity that affects every subsequent step.

This guide covers the complete seed preparation sequence for Korean highland potato: seed size selection and the cut-vs-whole decision, the correct cutting technique and its disease implications, the suberisation period required after cutting, pre-sprouting (chitting) as a yield management tool specifically valuable at Korean highland altitudes, and the handling chain from cold storage through seed preparation to the EP-PAI-2100 planter hopper that preserves seed quality through each step.

Seed Size Selection — The Foundation of Emergence Uniformity

Korean highland potato — seed size uniformity determines emergence uniformity; small seed pieces and large seed pieces in the same planting pass produce staggered emergence that reduces overall yield

NAAS certified seed potato is supplied to Korean highland farmers in lots that have been graded by size at the certification facility. The standard Korean certified seed size grades are:

S Grade
30–50 g
Plant whole — never cut
M Grade
50–90 g
Plant whole — optimal
L Grade
90–120 g
Cut into 2 pieces — each 45–60 g
XL Grade
120–180 g
Cut into 2–3 pieces — each 40–60 g

Why 40–60 g is the target seed piece weight range:

The seed piece provides the sole nutrient and energy source for the developing sprout from planting until the first true roots begin absorbing soil nutrients (typically Day 8–12 after planting at 15°C soil temperature). A seed piece below 30 g has insufficient reserves to support vigorous sprout elongation through cold Korean highland spring soil at 10–12°C — producing weak, slow-emerging plants. A seed piece above 90 g (whole, un-cut) contains more reserves than the single sprout needs but also contains multiple dormant eyes that may all produce sprouts — creating a multi-stem plant with higher tuber count per stem but smaller average tuber size per tuber, which can reduce Grade 1 proportion for fresh market channels that require minimum diameter above 50–55 mm.

The Cutting Protocol — Technique, Orientation, and Disease Hygiene

Korean highland potato seed preparation — correct cutting technique preserves eye density while minimising cut surface area, reducing Fusarium dry rot infection entry points

Cutting seed potato introduces cut surfaces that are entry points for Fusarium dry rot and bacterial soft rot if the cutting implements are not hygienic and the cut surfaces are not allowed to suberise before planting. The correct cutting protocol minimises these risks while maximising the agronomic value of the cut:

1

Cut orientation — lengthwise stem-to-blossom end. Always cut seed pieces lengthwise from stem end (where the tuber attached to the stolon) to blossom end (the pointed end with fewer eyes). This orientation distributes eyes across each cut piece — both cut surfaces have eye density. Never cut across the equator (transverse cut) — this produces a blossom-end piece with few eyes and a stem-end piece with excessive eyes, creating unequal planting units.

2

Minimum 2 eyes per cut piece. Inspect each cut piece immediately — if a cut piece has only 1 visible eye, do not plant it as a seed piece. Seed pieces with a single eye have higher non-emergence risk than 2+ eye pieces because the single eye may be damaged, have reduced viability, or fail to produce a sprout in cold highland spring conditions. Sort and discard any single-eye cut pieces before the seed lot goes to suberisation.

3

Knife disinfection between tubers. Cutting implements (sharp, smooth-bladed knives) must be disinfected between each tuber to prevent transferring Fusarium or bacterial rot from an infected seed piece to subsequent healthy pieces. The practical disinfection method at Korean highland scale: two knife stations — while one knife is cutting, the other is soaking in a 1–2% sodium hypochlorite solution or 70% ethanol. Alternate knives between tubers. Discard any seed piece that shows internal discolouration (brown or black tissue inside) — it is infected and must not be planted.

4

Cutting temperature management. Cut seed at 10–14°C (the temperature range where Fusarium germination is slow but suberisation begins) rather than at cold storage temperature (3–4°C, where suberisation proceeds very slowly) or at warm room temperature (18°C+, where cut surfaces are immediately vulnerable to bacterial infection before suberisation begins). Remove seed from cold storage 4–6 hours before cutting and allow to equilibrate to 10–14°C before the cutting session begins.

Suberisation After Cutting — The Non-Negotiable Healing Period

Cut seed pieces must suberise (develop a protective corky layer over the cut surface) before planting. Unlike the wound healing for harvested tubers in the cold storage guide (which requires 10–14 days at 14–18°C), seed piece suberisation is faster because the cut surface area is smaller and the objective is only surface sealing, not deep tissue repair:

Seed piece suberisation requirements

12~16°C
Temperature for rapid suberisation
85–90%
Relative humidity — prevent desiccation of cut surface
3~5일
At 14°C for visible skin formation
어두운
Prevent greening during healing period

The 3–5 day suberisation period at 12–16°C fits within the Korean highland planting preparation timeline — seed removed from cold storage approximately 10 days before the target planting date provides: 1 day for temperature equilibration, 4–5 hours for cutting, 3–5 days for suberisation, 2–3 days for chitting (if used). This 7–10 day total seed preparation window aligns with the 2–5 day furrowing-to-planting interval — seed preparation begins when furrowing begins, and both complete at approximately the same time for Day 1 planting.

Pre-Sprouting (Chitting) — The Korean Highland Altitude Advantage Tool

Korean highland field preparation — at 600m altitude, the growing season is 90-110 days; pre-sprouted seed emerges 5-8 days faster than un-chitted seed, adding critical early-season growing time

Pre-sprouting (chitting) — allowing seed pieces to develop visible sprouts of 0.5–1.5 cm length before planting — is a seed preparation practice widely used in European and Japanese highland potato production but underutilised in Korean highland farming. At Korean highland altitudes where the growing season is 90–110 days and the final harvest date is determined by the first autumn frost (not by crop maturity), every additional growing day has measurable yield value. The case for chitting at Korean highland altitude:

Emergence acceleration:

Pre-sprouted seed with 0.5–1.5 cm sprouts at planting emerges 5–8 days faster than equivalent un-chitted seed in Korean highland spring soil at 12–15°C. This is because the pre-sprouted sprout has already consumed the dormancy-break energy and is in active cell elongation — it simply continues growing into the soil rather than initiating the whole dormancy break and germination sequence. At 600 m altitude where emergence of un-chitted seed takes 14–18 days, pre-sprouted seed emerges in 8–12 days — a 6-day earlier canopy establishment.

Yield benefit at highland altitude:

Korean highland potato yield research consistently shows that pre-sprouted seed produces 8–15% higher yield than equivalent un-chitted seed on the same field when the growing season is 100 days or less. The yield benefit comes from two mechanisms: earlier canopy establishment (capturing more total solar radiation before autumn senescence) and earlier tuber initiation (more days of active tuber bulking before harvest). The yield benefit from chitting is proportionally larger at higher altitudes (shorter season) and smaller at lower altitudes (longer season) — making chitting specifically valuable for the 700+ m Korean highland farms with 90-day growing seasons.

Uniformity benefit:

Pre-sprouted seed produces more uniform emergence than un-chitted seed because the visible sprout at planting confirms that each seed piece has broken dormancy and is ready to grow. Any seed piece that has not developed a sprout during the chitting period (dead pieces, severely Fusarium-infected pieces) can be discarded before planting — preventing the patchy emergence gaps that occur when dead seed pieces go into the ground with un-chitted seed without the pre-planting quality check that chitting provides.

Chitting Conditions and Procedure for Korean Highland Operations

Chitting requires specific environmental conditions to produce the short, thick, well-rooted sprouts (called “chits”) that withstand planting without breakage. The most common chitting error is allowing sprouts to become too long — long, etiolated sprouts break off in the planter mechanism and the benefit of chitting is negated:

매개변수 Target
Temperature 10–14°C during chitting Low temperature produces short, thick, slow-growing chits with well-developed root initials. Above 16°C: long, thin, fragile sprouts that break during planting. Below 8°C: sprouts develop too slowly to reach target length before planting date.
Light Diffuse light (not direct sun, not dark) Light exposure during chitting produces green, chlorophyll-containing chits that are denser and less fragile than the white, etiolated chits produced in total darkness. Diffuse light from a north-facing window or shade cloth is ideal. Direct sun causes desiccation of the chit surface.
Duration 10–21 days at 10–14°C, targeting 0.5–1.5 cm chit length Begin chitting approximately 3 weeks before target planting date (after suberisation is complete). Check daily from Day 10 — plant when the majority of seed pieces have chits in the 0.5–1.5 cm range.
Humidity 80–90% RH Prevent desiccation of the developing chit tip — the meristematic zone is sensitive to moisture loss. Do not chit in a heated room with low humidity (wood stove, floor heating) without supplementary humidification.

Planter Hopper Handling — Protecting Seed Preparation Investment at Step 4

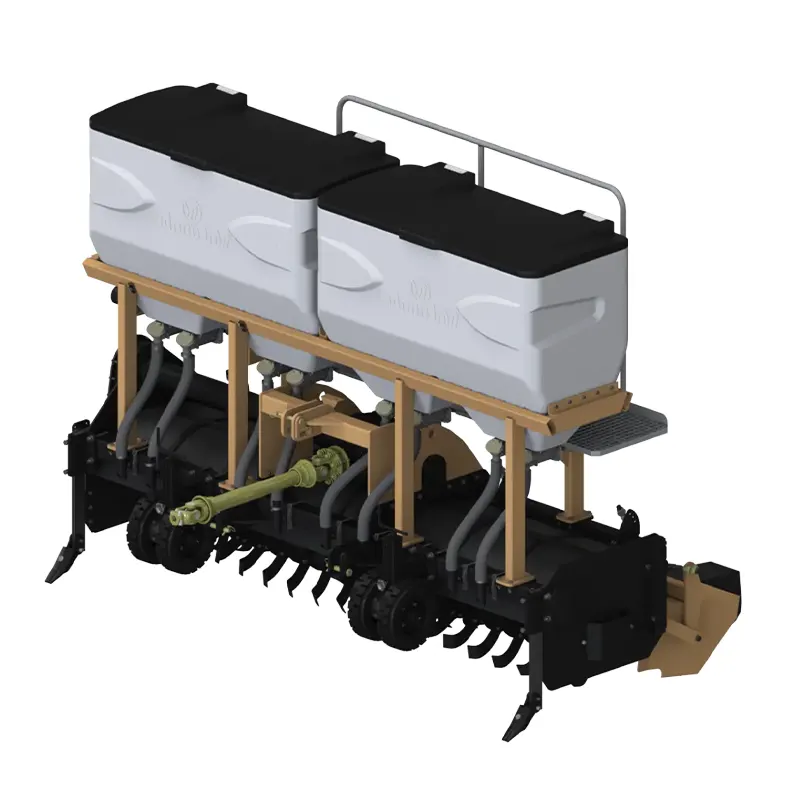
Korean highland potato farm — the careful seed preparation investment in cutting, suberisation, and chitting must survive the mechanical handling through the EP-PAI-2100 planter hopper and delivery mechanism

All the quality achieved through careful cutting, suberisation, and chitting is at risk during the transfer from seed preparation storage to the EP-PAI-2100 planter hopper. The hopper-to-soil sequence involves multiple handling steps that can break fragile chits, bruise suberised cut surfaces, or expose seed to conditions that interrupt the seed’s metabolic readiness for planting:

Container-to-hopper transfer:

Never pour prepared seed pieces from height into the planter hopper — the chit-tip impact with the hopper base is the single most common chit-breakage event. Lower the seed container to the hopper level and slide the seed pieces in with minimal drop height. In Korean highland morning conditions at 600 m, handle seed at the lowest possible speed in the first hour after removal from the chitting room — the seed is coolest (10–12°C) and most fragile at this point.

Hopper fill level management:

Fill the EP-PAI-2100 hopper to a maximum of 60–70% of capacity during operations with chitted seed. A full hopper allows the seed pieces in the bottom layer to be compressed by the weight of those above, and the agitation of the delivery mechanism moves them under the full load. In a partially filled hopper, the seed pieces have more space to move without compression — and the chits on each piece are less likely to be mechanically broken by hopper-wall contact under load.

Temperature at planting:

Pre-sprouted seed that is removed from the 10–12°C chitting room and placed directly into a warm field environment in late April at 600 m (ambient 15–18°C, soil 12–14°C) undergoes rapid temperature stress. Allow 2–3 hours of field-side acclimatisation before planting begins — carry the seed containers to the field headland 2 hours before planting starts to allow gradual temperature equilibration that prevents thermal stress activation of metabolic changes in the prepared seed.

Variety-Specific Seed Preparation — How the Four Korean Varieties Differ

The four Korean highland potato varieties covered in the variety guide (Sumi, Daejima, Dubaek, Atlantic) have different physiological responses to seed cutting and chitting that produce variety-specific recommendations:

Sumi:

Strong dormancy break — chitting is effective but not essential at 600 m altitude (Sumi reliably emerges within 12–16 days without chitting at 15°C soil). For farms at 700+ m with 90-day growing seasons, chitting Sumi is recommended. Sumi tolerates cutting well — large tubers above 90 g can be cut without excessive disease risk when knife hygiene is maintained.

Dubaek:

Long dormancy — Dubaek stored for the February premium market has typically broken dormancy naturally by April planting time. Chitting Dubaek is highly effective at accelerating emergence uniformity because the long dormancy means some seed pieces are further along the dormancy-break sequence than others — visible chitting brings all pieces to a confirmed ready-to-grow state before planting. Plant whole where possible for Dubaek — cutting increases Fusarium risk on this high-value seed.

Atlantic:

Processing contract supply — uniform emergence date is important for contract delivery date management. Chitting Atlantic is recommended to ensure the tight canopy closure timing that the processing supply chain requires. Atlantic tubers are typically medium-sized (50–90 g) — whole-seed planting is preferred for Atlantic; cut only if tubers are above 90 g.

자주 묻는 질문

Can I use saved seed from my own harvest instead of certified seed for Korean highland potato?

Technically yes — there is no legal prohibition on using saved seed for commercial potato production in Korea (unlike wheat and some other crops where variety protection prohibits saved seed). However, the practical agronomic case against saved seed in Korean highland conditions is strong. Saved seed accumulates virus (PVY, PLRV) through successive propagation — each generation has a higher probability of virus infection than the previous. After 3–4 generations of saved seed use on the same farm, virus incidence commonly reaches 20–40% of the seed lot, producing an equivalent proportion of stunted, low-yielding plants in the field. NAAS certified seed is inspected and tested to below 1% virus tolerance — paying the certified seed price premium over saved seed reflects this 30–50% yield advantage in the first-generation certified seed crop. For certified seed production blocks (where the NAAS premium applies to the output), only NAAS Registered Seed can be used as the input. Korea Watanabe advises connecting all seed procurement through Korea’s certified seed supply chain for both commercial and seed production blocks.

How does the stone clearing quality interact with seed piece quality at planting?

The interaction is through the soil contact quality around the seed piece after planting. A seed piece placed by the EP-PAI-2100 potato machinery in a ridge of fine, uniform tilth from the THOR 2.4 암석 분쇄기-cleared and PSW-3200-tilled soil has maximum contact between the seed piece surface (including the cut suberised face) and fine mineral particles. This uniform contact creates a consistent capillary moisture environment around all surfaces of the seed piece — supporting rapid suberisation of the cut surface (if it has not fully completed) and even moisture supply to all emerging root tips. In coarse-tilth, stone-disrupted ridges, the seed piece sits in a void-filled environment with irregular contact — some surfaces touching stone (thermal extremes, poor capillarity) and others in air voids. The seed piece can still germinate in these conditions, but emergence timing and uniformity are less predictable.

How long after cutting can seed pieces be stored before suberisation begins to degrade?

Cut seed pieces should ideally begin suberisation at 12–16°C within 4 hours of cutting — this is the window when fresh cut surfaces are most responsive to suberisation initiation. If cut seed is returned to cold storage (3–5°C) immediately after cutting (for example, because the planting date is still 2 weeks away), suberisation proceeds very slowly at cold storage temperature and the cut surface remains susceptible to Fusarium for the extended holding period. For cut seed that must be held more than 3 days before the planting date, the recommended sequence is: cut → immediate suberisation room at 12–14°C for 3–5 days until cut surface is visibly healed → then either hold at 12°C with light for chitting, or return to 8°C storage (above Fusarium-optimal but below full cold storage) until planting. The critical mistake to avoid: cutting seed and storing in deep cold (3–5°C) immediately — the cold temperature does not prevent Fusarium activity on fresh cut surfaces as effectively as it does on intact tuber storage.

Should I apply a fungicide seed treatment to cut pieces?

Korean NAAS-registered seed treatments for potato include fludioxonil-based and thiram-based products registered for application to seed potato pieces before planting, primarily targeting Rhizoctonia and Fusarium. Application to cut surfaces after suberisation (applying the fungicide after the cut surface has healed, not to fresh cuts) is the correct sequence — applying fungicide to fresh cut surfaces before suberisation provides some protection but may slightly inhibit the suberisation process itself if applied too early. The fungicide is most effective applied as a dust or spray to fully suberised cut pieces 12–24 hours before planting. Confirm the current Korean registration status of any seed treatment product with your county RDA extension office before use — the registered product list for potato seed treatment changes periodically.

How does the EP-PAI-2100 handle chitted seed — does the chitting interfere with the planter mechanism?

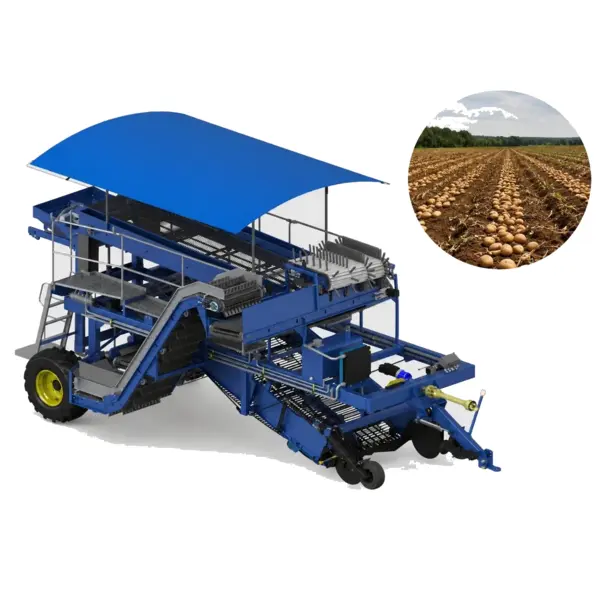
그만큼 EP-AWB-1600 감자 수확기‘s seed delivery mechanism is designed for whole and cut seed pieces within the 30–90 g size range — the normal operating range for certified Korean seed potato. Short chits (0.5–1.5 cm, as described in the target range above) do not interfere with the delivery mechanism if the hopper fill level is kept at 60–70% and the seed pieces are handled gently to prevent the chit tips breaking off before delivery to the soil. Chits above 2 cm are at increasing risk of breakage in the delivery mechanism, particularly where the seed piece must make a direction change in the delivery tube. Maintaining chit length below 1.5 cm through temperature management of the chitting room (keeping the room below 14°C) prevents the mechanism damage that longer chits would cause.

Complete Potato System — From Seed Preparation to EP-PAI-2100 Planting

Variety + altitude + target planting date → seed preparation timeline (cutting, suberisation, chitting) coordinated with EP-R furrower and EP-PAI-2100 planting schedule. Korea Watanabe, Ansan-si, Gyeonggi-do.

지금 바로 연락주세요

편집자: Cxm

태그: