The tractor-mounted single-row potato digger is the workhouse of small and medium potato operations worldwide — from the highland farms of Benguet in the Philippines to the market gardens of southern England and the seed potato fields of western Canada. It is compact enough to work in 3-metre rows, simple enough to maintain without specialist engineers, powerful enough to harvest at 1–3 ha per hour, and — when correctly matched to the tractor pulling it and the soil beneath it — precise enough to deliver Grade 1 potatoes with minimal bruising and minimal stone contamination.
This guide covers how the machine works, how to match it to your tractor, what the key components determine about harvest quality, how to set it correctly for your row spacing and planting depth, and how stone management before harvest determines whether the digger delivers its performance potential or spends the season in maintenance downtime. Korea Watanabe’s machine à pommes de terre range includes both single-row mounted and trailed configurations; this article covers the mounted single-row digger in full.
How a Single-Row Mounted Potato Digger Works
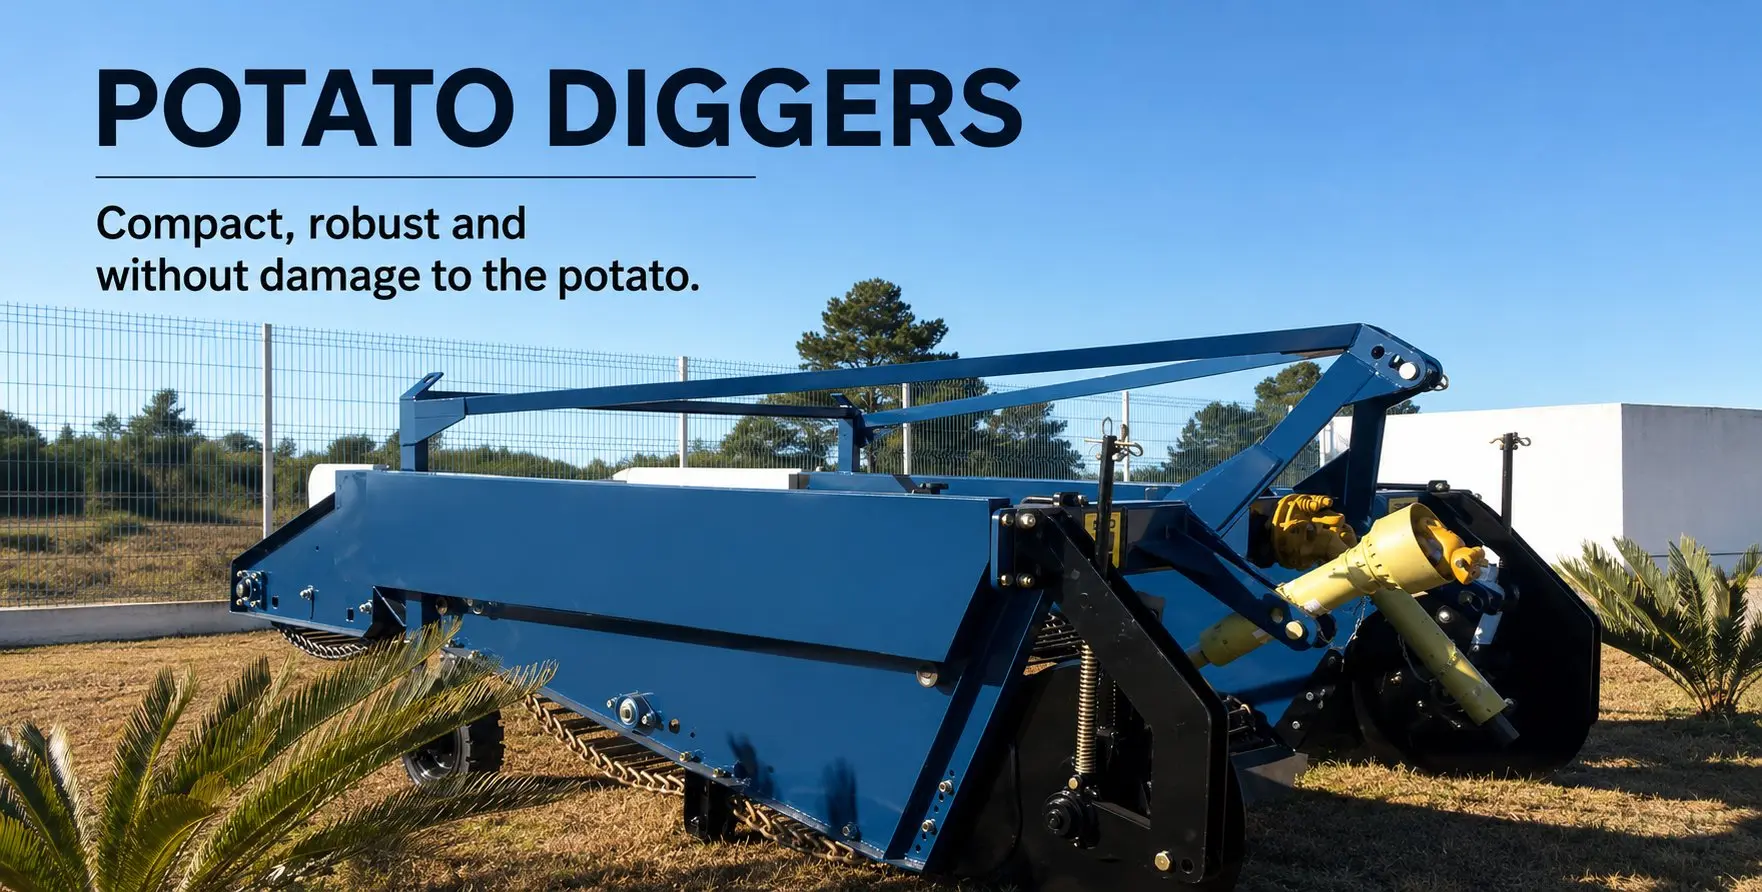
The single-row mounted potato digger is a straightforward but precisely engineered machine. It attaches to the tractor’s three-point rear linkage, receives drive from the PTO shaft, and processes the potato row through three sequential stages in a single forward pass. Understanding what each stage does — and what can go wrong at each — is the starting point for both correct adjustment and rational maintenance budgeting.
UN
Stage 1 — Digging Share: Lifting the Row
The hardened share blade (boron steel, Brinell 400–450 HB) drives under the potato row at the set depth, lifting a ribbon of soil and tubers onto the elevator. Share width is matched to the planted row width — typically 300–450 mm for standard varieties. The share’s angle and depth setting determine how cleanly the row is undercut without driving tubers into the moving chain. A correctly set share lifts the entire root zone without disturbing adjacent unplanted soil — critical for avoiding the secondary bruising that comes from tubers being pushed sideways during lifting.
B
Stage 2 — Elevator Chain: Separating Soil from Tubers
The vibrating elevator chain — an open-weave web of cross-rods spaced 28–35 mm apart — carries the lifted soil-potato mass at a controlled upward angle (typically 18–22°). As the chain moves, the soil, clods, and small stones fall through the rod gaps while the larger tubers ride on top to the upper discharge end. The chain’s vibration frequency (determined by an eccentric shaft in the drive system) is critical: too slow and clods don’t break up; too fast and tubers are thrown against the chain rods — creating the bruising that appears as blackspot at the pack house. Correct chain speed is set by PTO RPM and the chain drive ratio.
C
Stage 3 — Side Riddle and Discharge: Final Separation
At the top of the elevator, the tuber stream reaches the side riddle or secondary web — a laterally-mounted separation screen that performs a final shake to remove remaining soil and small stones before the potatoes are deposited in a windrow alongside the machine. The quality of this final separation determines how clean the load is at the collection pass: a poorly adjusted riddle allows small stones and clods into the windrow, which then combine with tubers in the collection bucket and cause further bruising and pack house contamination. Riddle adjustment — angle, vibration speed, and mesh size — is the final tuning point that differentiates clean Grade 1 output from a mixed load that loses value at intake.
Tractor Matching — HP, PTO and Three-Point Hitch
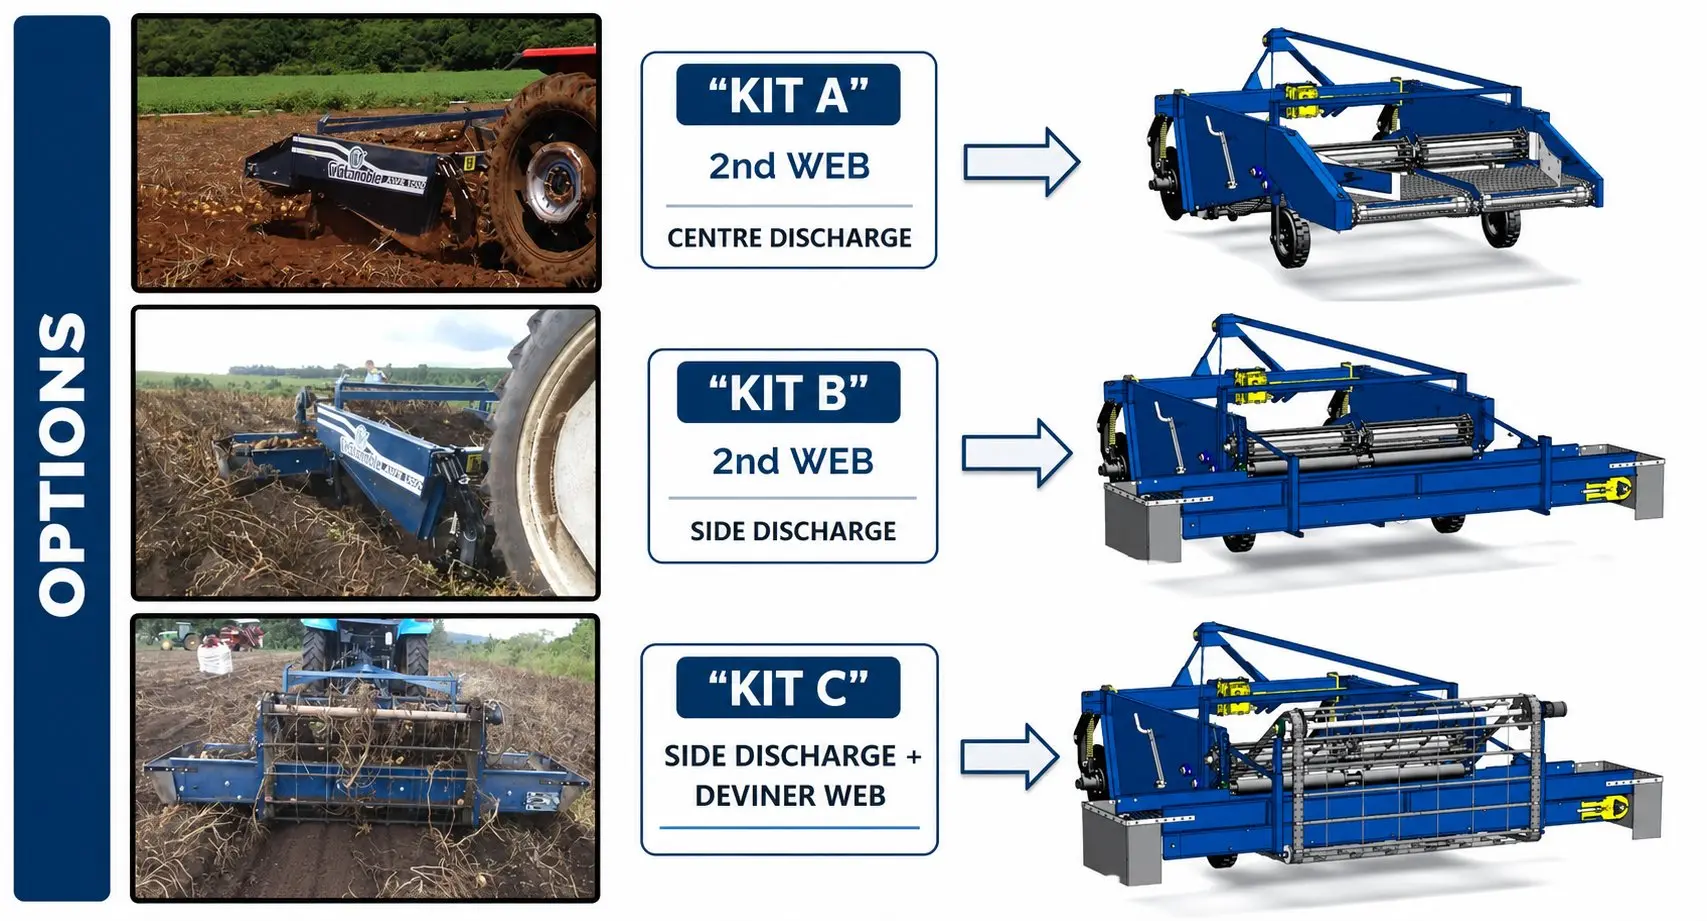
The single-row mounted potato digger places moderate but sustained demands on the tractor — the PTO must maintain consistent speed under varying soil load, and the three-point hitch must carry the digger’s weight while allowing the depth-sensing gauge wheels to track the soil surface accurately. Under-powering the tractor causes PTO speed drops that change elevator chain vibration and reduce soil separation efficiency; over-specifying the tractor relative to the digger wastes resources without improving performance. The following matching table covers the full range from small market-garden tractors to mid-range farm tractors:
| Tractor HP Range |
Hitch Category |
PTO |
Typical Application |
Verdict |
| 28–40 HP |
Cat 1 |
540 tr/min |
Market garden, SE Asian highland |
Marginal |
| 40–60 HP |
Cat 1 / Cat 2 |
540 tr/min |
Small farm, market garden, seed plots |
Recommandé |
| 60–80 HP |
Cat 2 |
540 tr/min |
General farm, ware and seed potato |
Optimal |
| 80–120 HP |
Cat 2 / Cat 3 |
540 / 1000 tr/min |
Same as THOR clearing tractor — dual purpose |
Versatile |
The 60–80 HP range represents the optimal match for most single-row mounted digger applications: sufficient power reserve to maintain 540 RPM PTO speed through dense clay soils or when digging depth increases on uneven terrain, and a Category 2 three-point hitch that provides the positional precision needed for accurate depth control through the gauge wheels. Tractors in this range also typically have adequate rear-axle hydraulic lift capacity (800–1,500 kg, depending on model) to transport the digger safely on headlands and farm tracks.
For farms with an 80–120 HP tractor used for stone clearing with the THOR rock crusher in the pre-planting season, the same tractor can transition directly to potato digger duty at harvest with a PTO reduction gearbox if required (for older tractors with 1000 RPM rear PTO). This dual-use approach — one tractor powering the full pre-planting clearing and the harvest operation — reduces total equipment investment while maintaining the performance standard at both operational stages.
PTO and Hitch Specification Quick Reference
Vitesse de prise de force
Standard: 540 RPM. Operate within ±5% of rated speed at all times. PTO drops below 510 RPM under heavy load signal inadequate tractor HP — reduce forward speed or digging depth.
PTO Driveshaft
Telescoping driveshaft with universal joints. Always verify minimum compressed length before operating at minimum hitch height — shaft collapse under compression damages gearbox input splines.
Three-Point Hitch
Category 1 (lower link pins 22 mm) for tractors up to 60 HP. Category 2 (pins 28 mm) for 60+ HP. Category mismatch prevents correct hitch pin engagement — always verify before attaching.
Lift Capacity
Minimum rear lift capacity: 600 kg at hitch point for safe road transport of the digger. Verify against your tractor’s published lift chart at the relevant lift height before field transport.
Key Components — Share, Chain and Separator in Detail
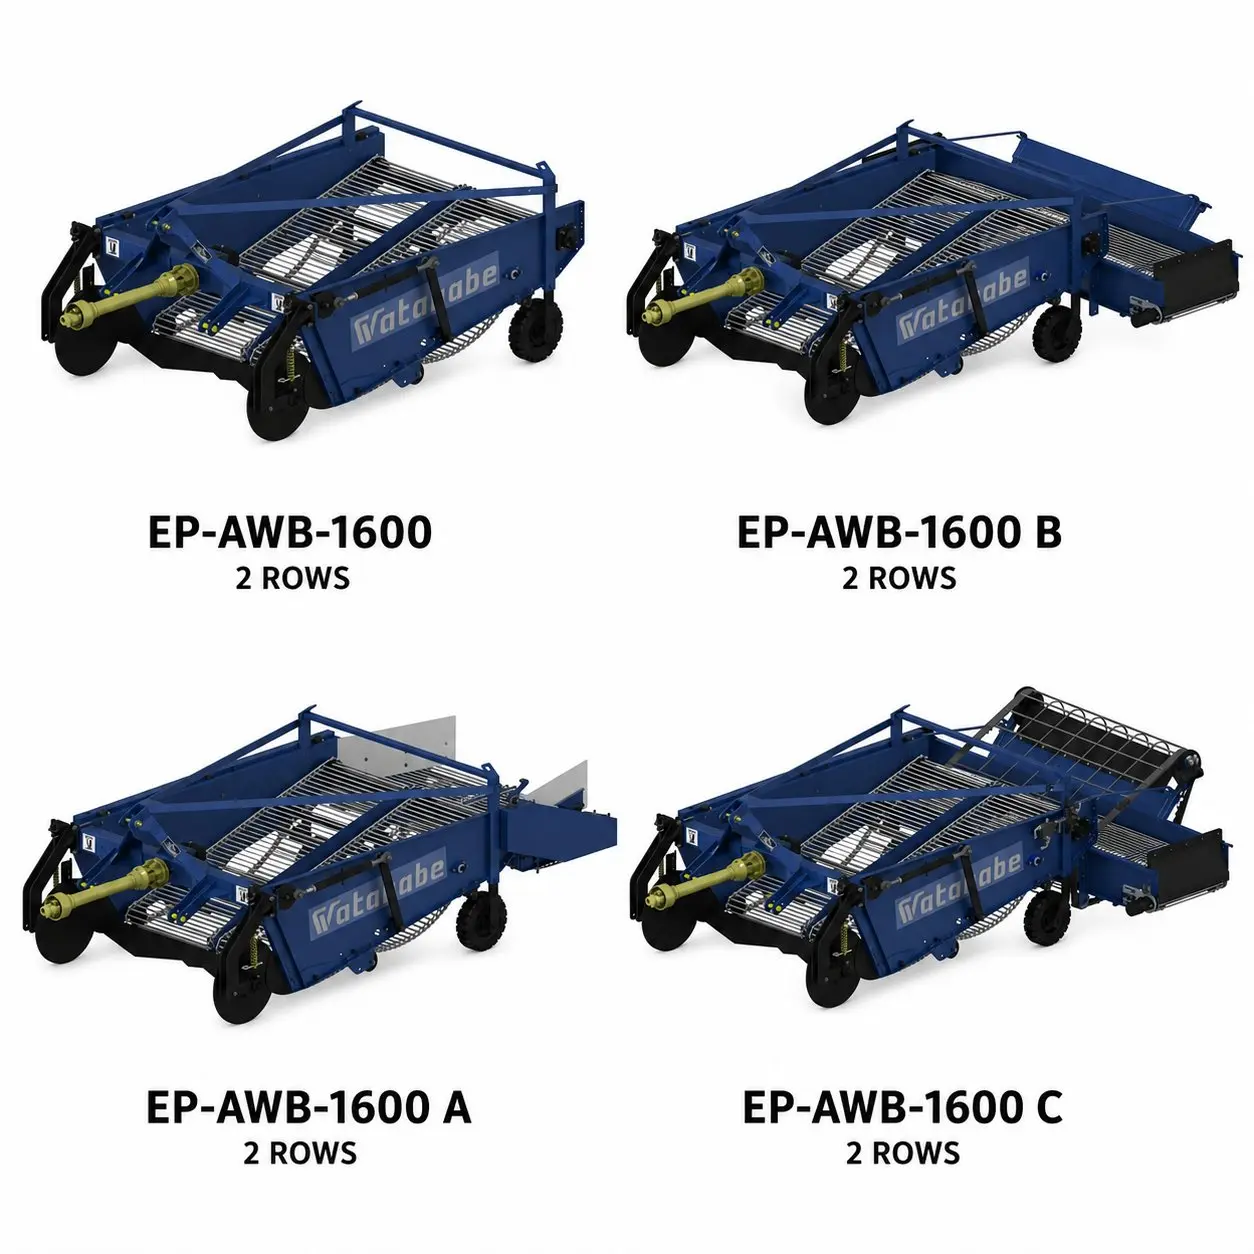
The share is the highest-wear component and the primary interface between machine and soil resistance. Boron steel hardened to Brinell 400–450 HB provides the optimum balance between abrasion resistance and machinability for sharpening. Share width options — typically 300 mm, 380 mm, and 450 mm — match the planted row width. The share’s attack angle (typically 22–28° from horizontal) determines how aggressively it undercuts the row: shallower angles for lighter sandy soils, steeper angles for heavy clay.
Replacement Signal
When the cutting edge has receded more than 8 mm from the original profile, or when tractor fuel consumption increases by >15% at constant speed and depth — the share is dulled and must be replaced or resharpened.
Rod spacing of 28–35 mm is the standard range — narrower for sandy soils where small tubers need support on the chain, wider for heavy clay where large clod throughput is required. The chain’s speed relative to forward travel speed is the key separation efficiency variable: at the standard ratio, soil residence time on the chain is approximately 3–5 seconds — enough for loose sandy soil to fall through but insufficient for large wet clods without the vibrating eccentric action. Chain tension should be checked every 50 hours: a correctly tensioned chain sags 10–15 mm at the centre of the upper run when pressed by hand with the machine stopped.
Maintenance Interval
Lubricate chain rollers every 10 operating hours with penetrating chain oil. Inspect rod ends for fatigue cracking every 50 hours. Replace chain when elongation exceeds 3% of original pitch-to-pitch measurement on a 12-link sample.
⚙ Side Riddle / Star Wheel
The secondary separation stage — either a laterally oscillating riddle frame or rubber-covered star wheels — performs the final soil and stone removal before the potatoes are deposited in the windrow. Riddle mesh size and oscillation angle are the two primary adjustments: larger mesh and steeper angle for sandy free-running soil; finer mesh and shallower angle for sticky clay where large clods must be retained long enough to be broken down. Star wheel gap spacing is set by the spacer collar system — typically adjusted in 5 mm increments to match the target tuber diameter and exclude stone sizes likely to be present.
Quality Indicator
Check windrow output at start of each field: no more than 3 stones >30 mm per metre of windrow indicates acceptable separation. More than this — adjust riddle angle steeper or increase star wheel gap, or assess whether stone clearing is required before continuing.
🛡 Stone Protection System
The shear bolt (or slip clutch on higher-specification models) is the last line of protection against catastrophic stone-induced driveline damage. The shear bolt is designed to fail at a predetermined torque threshold — absorbing the energy of a stone impact and protecting the gearbox and PTO driveshaft at the cost of a single bolt. Shear bolt replacement takes 5–10 minutes in the field but requires the correct grade and diameter — substituting a higher-grade bolt as a “temporary” fix risks transmitting the next stone impact directly to the gearbox. Always carry a stock of OEM-specified shear bolts for the complete harvest season.
Critical Warning
Never substitute a higher-grade or larger-diameter bolt than OEM specification. The shear bolt is a designed failure point — defeating it risks gearbox or shaft damage costing many times the price of a correct replacement bolt.
Depth Control, Row Spacing and Field Adjustment
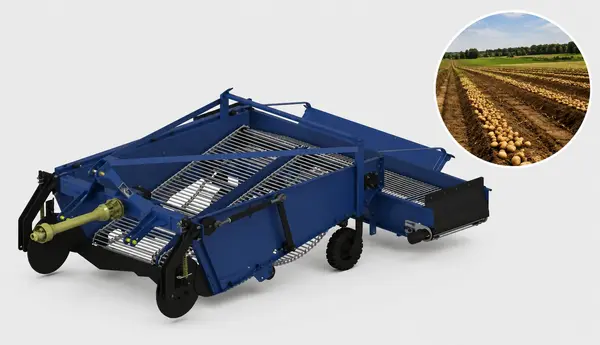
Correct adjustment of the mounted potato digger takes no more than 30 minutes at the start of the harvest season — and pays back in reduced bruising, lower fuel consumption, and fewer missed tubers throughout the entire campaign. The three critical adjustments are digging depth, share-to-row alignment, and working speed. Each interacts with the others: a change in depth changes the soil volume on the elevator (which changes chain load), and a change in speed changes the ratio of chain speed to forward speed (which changes separation efficiency).
| Adjustment Parameter |
Too Shallow / Slow |
Correct Range |
Too Deep / Fast |
| Digging depth |
Missed tubers; root tear damage |
Planting depth + 3–5 cm
(typically 15–22 cm) |
Excess soil; chain overload; fuel waste |
| Share-to-row offset |
Cuts into adjacent row ridge |
Share centred ±15 mm on planted row |
Misses edge tubers; bruising on share sides |
| Vitesse avant |
Soil buildup on chain; blockage risk |
1.5–3.0 km/h for most conditions |
Chain transit too fast; poor separation |
| Row spacing match |
Share too narrow; edge losses |
Share width = 75–85% of row pitch |
Share too wide; adjacent row disturbance |
The practical starting point for depth setting: establish the planting depth by pushing a rigid ruler down alongside a visible haulm at the start of the field — measure the tuber cluster’s lowest point. Set the digging share to this depth plus 4 cm. Then run a 20-metre test pass on the field headland, stop the tractor, and walk the windrow. If undamaged tubers are present in the undug soil — deepen by 2 cm. If the chain is carrying excessive soil with reduced separation — reduce forward speed by 0.3 km/h before reducing depth. These two adjustments cover 90% of in-field tuning requirements across soil types and conditions.
Stone Protection — Before the Digger, Not After
The single-row mounted digger’s compactness and simplicity make it highly effective on stone-free or low-stone-density fields. On medium- or high-stone-density fields, those same qualities — a relatively lightweight chassis, standard shear bolt protection, and smaller-diameter drive components compared to larger trailed machines — make it more susceptible to stone-induced damage than a heavy trailed digger with reinforced driveline. For this reason, stone management before the digger season is not optional on any field where the spring stone assessment returns more than 3 stones per m².
Korea Watanabe’s stone management equipment works in the field season before the potato digger, not alongside it. The sequence that protects the mounted digger is straightforward and is covered in detail in the concasseur de roches et ramasseur de pierres specifications:
①
THOR Rock Crusher — Autumn or Spring Before Planting
Fractures sub-surface stone at the digger’s planned operating depth plus 3–5 cm. For a mounted digger operating at 18–22 cm, set THOR at 20–26 cm — ensuring the full operating zone is stone-free. Complete THOR before planting, not before harvest (cleared soil needs settlement for ridge formation). A single THOR pass protects both the planting equipment and the subsequent harvest digger from stone contact.
②
Ramasse-roches CT-2100 — Permanent Stone Removal
After THOR fragmentation, the CT-2100 permanently removes the crushed stone fragments. This is the step that makes the field genuinely lower-stone rather than just redistributing stone to a smaller fragment size. On a field cleared with THOR + CT-2100, the shear bolt and slip clutch protection systems function as designed safety margins — not as permanent first lines of defence that are constantly activated.
③
Râteau à roches BlackBird — Annual Pre-Harvest Surface Pass
Even after THOR + CT-2100 deep clearing, frost heave and cultivation resurface small stones each season. A BlackBird pass 4–6 weeks before harvest removes these and resets the field to its cleared condition. At 9.5 m working width and 10–12 km/h operating speed, a BlackBird pass covers 10 ha in under 3 hours — the lowest-cost annual maintenance investment in the potato digger protection system.
Foire aux questions
Q
Can I use a single-row mounted digger with a front-wheel-assist (FWA) tractor, or does it require four-wheel drive?
The single-row mounted digger operates with either two-wheel drive (2WD), front-wheel assist (FWA), or full four-wheel drive (4WD) tractors. The PTO connection and three-point hitch are identical across all drive configurations. Traction requirement, however, favours FWA or 4WD on clay soils, wet conditions, or slopes above 8°: the additional drag of the digging share at full depth creates a de-weighting effect on the tractor’s front axle that reduces steering control on 2WD machines in soft soil conditions. On dry sandy loam — which is common in market garden contexts — 2WD tractors of 50+ HP operate without traction issues. Verify your specific tractor model’s rear PTO shaft type (splined 6-tooth 540 RPM standard shaft) against the digger’s input coupling specification before attaching for the first time.
Q
What is the correct approach to adjusting the digger for seed potatoes versus ware potatoes, given that seed potatoes are planted at different densities and depths?
Seed potato production places stricter requirements on harvest damage tolerance because even minor skin scuffing or internal bruising on the seed creates infection entry points that reduce emergence rates and increase stolon blight incidence in the following crop. The digger adjustments that specifically favour seed potato harvest: (1) Reduce forward speed to the lower end of the operating range (1.5–1.8 km/h) — slower speed increases chain residence time and separation effectiveness, reducing the number of small stones remaining in the tuber stream. (2) Set chain tension towards the tighter end of the specified range — a tighter chain vibrates with higher frequency at the same PTO RPM, improving clay clod breakdown without requiring increased speed. (3) Set riddle mesh one size finer than for ware potato on the same soil — seed potato buyers have stricter stone and clod contamination tolerances. (4) Increase the share’s angle slightly (by one notch on the adjustable mounting if fitted) to ensure a cleaner undercut that avoids skin damage on the tubers being lifted onto the chain’s leading rods.
Q
How does soil type affect the choice between a star wheel separator and a riddle frame separator on a single-row digger?
The choice between star wheel and riddle frame secondary separation depends on the soil’s clod-forming tendency and stone size distribution. Star wheels excel in sandy and free-running soils where clod formation is minimal — they provide gentle, consistent stone-potato separation without the lateral shock of a full riddle oscillation. Star wheels are also better suited to small highland or market garden tractors where the additional vibration of a full riddle frame can cause linkage fatigue on lighter three-point hitches. Riddle frames — with their larger oscillating surface and adjustable mesh size — are better suited to clay and heavy loam soils where large clods must be progressively broken down across the separation surface. They are more adjustable to varying soil conditions within a single field (by changing oscillation angle and speed during the pass) but require a more structurally rigid three-point hitch to absorb the cyclic forces generated. In practice: for small market garden tractors below 50 HP on light soils, specify star wheel configuration. For 60+ HP tractors on clay soils with large clod potential, specify riddle frame with adjustable oscillation speed.
Q
When does it make sense to upgrade from a single-row mounted digger to a trailed two-row digger, and what are the operational differences?
The decision to step up from single-row mounted to trailed two-row should be driven by harvested area per season rather than farm size alone. A single-row mounted digger at 1.5–2.5 km/h harvests approximately 0.5–0.8 ha per hour including headland turns — adequate for farms up to 8–12 ha of potatoes per season with a single machine. Beyond 12 ha/season, the harvest window constraint (potatoes should be harvested within a specific skin-set period after haulm destruction, typically 14–21 days) often makes a second pass more efficient with a wider machine. Operationally: the mounted digger requires a tractor to drive in the planted row, whereas the trailed digger typically offset-mounts to allow the tractor to drive in the inter-row. The trailed digger also has significantly higher static weight that improves operating stability in uneven terrain but requires a tractor with adequate rear lift capacity (typically 2,000+ kg at hitch point) for safe transport. For most small farms below 10 ha potato area, the single-row mounted digger remains the more cost-effective and logistically simpler solution.
Q
What end-of-season maintenance does the single-row mounted digger require before winter storage?
End-of-season maintenance for the single-row mounted digger should complete within a half-day for one operator and covers: (1) Full wash-down with a low-pressure water jet — removal of soil and crop residue before it sets and causes corrosion. Do not use high-pressure washers on chain rollers or PTO driveshaft guards. (2) Chain inspection: remove the chain from the machine, check each rod for fatigue cracks at the weld points, measure elongation on a 12-link sample, replace if elongation exceeds 3% of original pitch. Soak the chain overnight in a penetrating chain bath before reinstalling or storing separately. (3) Share inspection: check for cracks in the hardened zone (not surface chips — through-cracks). Measure remaining material above the original cutting-edge profile. Order replacements for shares within 3–5 mm of minimum thickness before the following season. (4) Gearbox: drain and refill with fresh oil to the specified grade and level — gear oil that has operated through a full harvest season will show darkening from metal wear particles that become abrasive if left over winter. (5) All grease nipples: apply fresh grease to all accessible nipples — 12–18 points on a typical machine. (6) Paint touch-up on bare metal from harvest impacts, then light coat of water-displacing spray on all unpainted metal surfaces before dry indoor storage.
Korea Watanabe Potato Machinery
Single-Row Mounted Digger — Specified for Your Tractor, Soil and Crop
Your tractor HP + hitch category + soil type + row spacing + stone assessment → Korea Watanabe specifies the correct share width, chain configuration, and separator type, and provides the THOR + CT-2100 stone preparation protocol that keeps your arracheuse de pommes de terre operating at design specification throughout the season.
Korea Watanabe Rock Crusher Tractor Co., Ltd. · Ansan-si, Gyeonggi-do